
Choosing the Right Wood for Fence Installation
Choosing the Right Wood for Fencing plays a big role in successful fence installation and long-term value.
Putting up a new wooden fence is a big money decision. Many homeowners only think about the initial cost and not what comes later. A cheap fence might look nice at first, but experts say the upfront price is only about 40% of what you will spend over time. When choosing wood for your fence, it's important to think about how long it will last and the maintenance needed, not just the savings on the first day.
Nature quickly tests any wooden barrier, primarily through moisture and UV exposure that trigger warping and rot. Without inherent resistance to these local elements, a sturdy privacy screen can deteriorate into a gray, leaning liability in just a few seasons.
Selecting the right material for a wooden fence requires balancing your current budget against a realistic timeline. By selecting lumber rated for a 15 to 25-year lifespan, you ensure your property remains secure without facing early replacement bills.
Why Your Local Climate is the #1 Factor in Wood Selection
While it's tempting to pick a fence based on color alone, the real test happens when that wood meets your local weather. High humidity and drastic temperature swings act like a stress test for every board in your yard. If you live in a damp climate, porous species will drink up moisture and swell, while arid heat causes them to shrink rapidly.
This constant expansion and contraction triggers a phenomenon known as "wood memory." When a board dries out unevenly, it stubbornly tries to return to the curved shape of the original tree branch it came from. This biological reflex creates the warping and bowing you see in cheap fences, where planks twist away from their posts as if they have a mind of their own.
The sun poses an equally aggressive threat to your investment through ultraviolet (UV) degradation. UV rays relentlessly attack lignin, which acts as the natural glue holding wood fibers together. As this internal bond breaks down, the rich red or gold tones of fresh lumber bleach out, leaving behind a silver-gray surface that eventually becomes brittle.
Combating these environmental forces often requires a material engineered to resist rot and physical stress from the inside out. For many homeowners needing a durable defense without a high price tag, the answer lies in wood that has been chemically fortified to survive the elements.
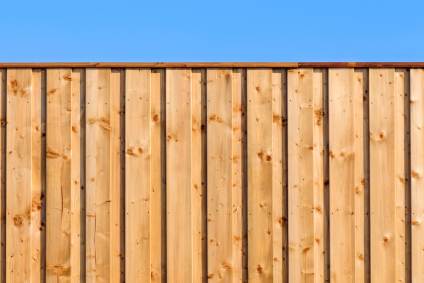
Pressure-Treated Pine: The 'Deep-Soak' Solution for Budget-Conscious Builders
For most residential backyards, the default choice is Southern Yellow Pine that has undergone pressure treatment. Think of this process as a high-intensity marinade; manufacturers place the lumber in a pressurized tank to force preservatives deep into the wood fibers, creating a chemical barrier against termites and fungal decay. This engineering results in a basic wood fence that is structurally sound but costs 30-40% less than premium alternatives, making it the clear champion of the affordable wood fence market.
However, a generic "treated" stamp isn't enough to guarantee longevity. You must inspect the end tag on every post to ensure it is rated for "Ground Contact" rather than just "Above Ground." This designation means the wood contains a higher concentration of preservatives---often Micronized Copper Azole (MCA)---specifically designed to stop the buried portion of your posts from rotting.
The Pressure-Treated Tag Checklist:
- Use Category: Look for "Ground Contact" (often marked UC4A) for any wood touching soil.
- Chemical Code: Confirm the preservative type (common codes are MCA or CA-C).
- Moisture Warning: Expect heavy, wet boards that will shrink as they dry.
While the price point is attractive, patience is required. Because this lumber is saturated with liquid, it needs up to six months to dry out before it can accept paint or stain; apply a finish too early, and it will simply peel off. When weighing pressure treated pine versus cedar costs, remember that pine saves money upfront but demands more labor later. For homeowners who want immediate curb appeal without the waiting game or chemical green tint, the answer lies in species that fight rot naturally.
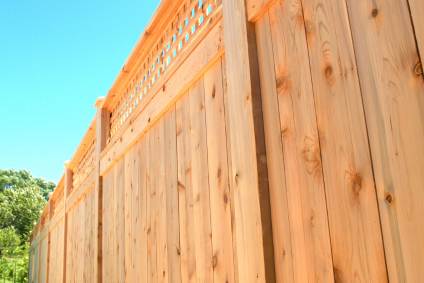
Cedar and Redwood: The Naturally Rot-Resistant Heavyweights
If the chemical green tint of treated pine doesn't appeal to you, naturally rot-resistant wood types like Cedar and Redwood provide a premium alternative. These species don't rely on a pressurized tank because nature equipped them with tannins---bitter, natural oils that permeate the fiber. Bugs hate the taste and fungi struggle to grow on it, meaning you can install a timber fence that looks beautiful immediately without the six-month drying period required for pine.
Beyond their chemical-free defense, these woods offer superior "dimensional stability," which is simply the wood's ability to stay straight over time. While pine often twists or bows as it dries due to "wood memory," Cedar and Redwood generally lie flat against the rails, preventing gaps. To ensure this performance, you must insist on "all-heartwood" grades.
The protective oils are found mostly in the dark center of the tree, called heartwood. The light outer layers, known as sapwood, have very little protection against decay.
When comparing how long a redwood fence lasts versus Cedar, the answer often depends on the specific variety you choose:
- Western Red Cedar: The gold standard; rich in natural oils, highly resistant to rot, and ideal for wet climates.
- Inland Cedar: Often cheaper and lighter in color; contains fewer protective oils and is better suited for drier regions.
For homeowners who love the look of wood but want to eliminate maintenance entirely, the next step up involves modern engineering rather than botany.
The Tropical Hardwood and Composite Alternative: Is the High Price Worth It?
If longevity is your absolute priority, the trade-offs regarding tropical hardwood fencing lean heavily toward performance. Species like Ipe (often called "ironwood") are so dense they sink in water and register off the charts on the Janka Hardness Scale, a measure of how resistant wood is to denting and wear. While the upfront cost is significantly higher than cedar, you are buying a fence that can last 50 years without chemical treatments. However, this is strictly a "forever home" investment; if you plan to move in five years, you likely won't recover that premium expense.
For homeowners who want the aesthetic of timber without the sanding schedule, the debate between composite fencing and natural wood is the modern standard. These boards blend wood fibers with recycled plastics, usually featuring "capping"---a hard outer shell that locks out moisture and prevents fading. While often marketed as "maintenance-free," "low maintenance" is more accurate; you still need to scrub away mildew, and unlike wood, dark composites can retain enough solar heat to burn a hand.
Sustainable lumber options for residential fencing often point to composites due to their recycled content, but consider these trade-offs for the busy homeowner:
- Pros: No splintering, consistent color, and 25-year structural warranties.
- Cons: High initial price, prone to surface scratching, and cannot be sanded down if damaged.
Once you've selected your material---whether natural or engineered---you need to ensure you aren't accidentally buying the "reject" pile.
Grading Your Lumber: How to Read a Wood Pile Like a Contractor
Understanding lumber grades for outdoor construction lets you balance looks with budget. You will generally encounter "Clear" (knot-free), "Select" (minor defects), and "Common" (rustic) options. A smart money-saving tactic is buying high-grade material for visible pickets and cheaper "Common" boards for hidden rails, ensuring your wood fence looks premium without paying for invisible perfection.
Regardless of where you source your materials, you must inspect every board for "wane"---remnants of bark or rounded edges that create unwanted gaps in your privacy line. You should also "sight" the board by looking down its length to spot "crowning," a distinct curvature along the edge that makes a level installation impossible to achieve.
Finally, avoid boards with severe "checking," which are cracks running with the grain caused by uneven drying. While hairline fractures are acceptable, deep splits will widen with weather exposure and eventually destroy the picket. With healthy lumber secured, the next challenge is ensuring those boards survive the soil through proper installation.
Installation and Maintenance: The 'Ground-Up' Strategy for Longevity
Even premium lumber acts like a sponge during fence installation and over the years. Wood absorbs moisture and dries out repeatedly---a "hydroscopic cycle" that eventually causes the timber to crack and twist. To fight this, focus on treating fence posts for ground contact by adding a few inches of gravel to the bottom of your post holes. This simple drainage layer prevents your investment from sitting in a permanent puddle, stopping rot where it typically starts.
Once the structure is up, surface protection is critical. While water-based sealants sit on top like a film and eventually peel, oil-based stains penetrate deep to condition the fibers. A reliable maintenance guide usually recommends oil because it moves with the wood rather than cracking against it, keeping the fence looking newer for longer.
Long-term care doesn't require constant work, just consistency. Follow this timeline to maximize lifespan:
- Year 1: Apply initial oil-based stain after the wood fully dries.
- Year 3: Power wash to remove moss and re-apply stain.
- Year 6: Inspect posts near the soil line for soft spots.
- Year 10: Replace warped pickets and seal the entire fence again.
Routine care is your best method for preventing termite damage and preserving property value. With maintenance planned, you are ready to make the final purchase.
Your Wood Fence Decision Matrix: Finalizing Your Purchase
Think of your fence as an investment, not just a way to mark your property. If you plan to move in five years, pressure-treated pine is a good option. If you want to stay long-term, spending more on Cedar is worth it because it lasts longer. Don't choose a basic "white wood fence" unless you're okay with the high upkeep costs to maintain it.
If you're unsure where to buy wood for fence, compare local lumberyards, specialty fence suppliers, and big-box stores for grade availability, delivery options, and price. Many homeowners simply type searches like "wood fencing fence" or "house wood fence" when browsing, but comparing reputable suppliers locally will usually yield better grading options and support.
The Smart Buyer's Checklist:
- Posts: Verify tags specifically say "Ground Contact" rated.
- Hardware: Buy stainless steel fasteners to prevent rust bleeding.
- Math: Add 10% for waste when estimating fence materials and budget.
- Selection: Sight down every board to reject warped lumber.
- Finish: Plan your sealant strategy before installation.
Building a fence is heavy work, so ensure you only have to do it once. By pairing quality lumber with the right hardware, you turn a weekend of sweat equity into twenty years of curb appeal.
Frequently Asked Questions
Question: Why is my local climate the most important factor when choosing fence wood?
Short answer: Moisture, temperature swings, and sun exposure determine how wood behaves outdoors. In damp areas, porous species absorb water and swell; in hot, dry climates they shrink quickly. This cycle causes "wood memory," where boards try to return to their original curved shape, leading to warping and bowing. UV rays also break down lignin---the "glue" in wood fibers---bleaching rich tones to silver-gray and making surfaces brittle. Choosing rot-resistant species (naturally or pressure-treated) and planning for UV protection directly combats these climate-driven stresses and extends fence life.
Question: What should I check on pressure-treated lumber tags, and why does it matter?
Short answer: Look for three things:
- Use Category: Posts must be labeled "Ground Contact" (often UC4A) to withstand soil moisture and decay.
- Chemical Code: Confirm preservatives like MCA or CA-C for termite and fungal resistance.
- Moisture Warning: Boards are saturated and heavy; they will shrink as they dry. These details signal that your posts won't rot prematurely and that your boards will change dimension as they dry. Plan finishing accordingly---pressure-treated pine typically needs up to six months to dry before accepting paint or stain, or the finish will peel.
Question: Cedar vs. Redwood vs. Pine---how do I choose, and what does "all-heartwood" mean?
Short answer:
- Pressure-treated Southern Yellow Pine: Budget-friendly (30--40% cheaper than premium woods) and structurally sound after chemical fortification, but needs drying time and more maintenance.
- Cedar/Redwood: Naturally rot-resistant due to tannins, with superior dimensional stability (less twisting/bowing) and immediate curb appeal. Insist on "all-heartwood" grades---the darker inner wood where protective oils concentrate---since pale sapwood offers little decay resistance.
- Within cedar, Western Red Cedar is the gold standard for wet climates; Inland Cedar is lighter in color, has fewer natural oils, and suits drier regions.
Question: Are tropical hardwoods or composites worth the higher price?
Short answer: If longevity is your top priority and you're in a "forever home," tropical hardwoods like Ipe can last around 50 years without chemical treatments, but they carry a steep upfront cost you likely won't recoup if moving soon. Composites blend wood fibers and recycled plastics with a protective cap, offering low maintenance, consistent color, and 25-year structural warranties. Trade-offs include higher initial price, potential surface scratching, inability to sand out damage, and heat retention (dark boards can get hot). Choose based on your time horizon, tolerance for upkeep, and budget.
Question: What installation and maintenance steps most affect fence lifespan? Short answer: Start at the ground: set posts over a few inches of gravel in each hole to improve drainage and stop rot at the soil line. For finishing, prefer oil-based stains---they penetrate and flex with the wood, resisting peeling better than water-based sealants. Follow a simple care timeline:
- Year 1: Apply oil-based stain after wood fully dries.
- Year 3: Power wash to remove moss and re-stain.
- Year 6: Inspect posts at the soil line for soft spots.
- Year 10: Replace warped pickets and seal the entire fence again. Pairing good installation with consistent care is the easiest way to turn a weekend build into decades of service.
If you need a Fence specialist in Plano, Richardson or North Dallas, contact us now! If you want to learn about our Fence details, click THIS LINK.
